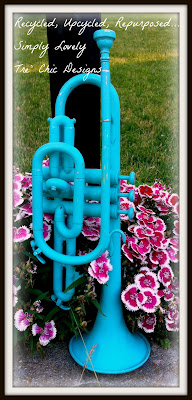
 My original thought was to use spray paint, but lately I'm just not loving it. I sure that has everything to do with the fact that I am in love love love with chalk paint right now. So there the horn sat. The thought of spraying it was like blah! The thought of hand painting, sanding and waxing all those curves was like YIKES no! And it sat. I had ideas of using a paint sprayer for the chalk paint and believe me that thought is still floating around my brain, but that's just not cost effective for me and I haven't really heard good things about the sprayers in my price range. Ahhh but a girl can dream and I do dream of sprays and spraying chalk paint happiness....maybe some day. Finally I told myself quit being a lazy coupled with the fact that my children tried to play the cornet everyday, that sucker needed out of the house and into the studio (aka garage).
  I started out with an 1 inch paint brush for the first coat but really found it to be to big for the tight spots and unable to really hit those curves well. I switched over to a much smaller artist brush and while it took more time it really did improve the coverage. So armed with my little brush I set about getting that pretty turquoise on that horn. After 2 coats of paint I went on the waxing, which I must say was tricking. Did I mention all the twists, turns and curves? How about those tight spots? Did I mention those? Sometimes my dreams just make things seem easier after all it's a dream :) As odd as it was to dream of horn painting and the amount of eyebrows raised in my direction as I tried to explain what I was planning to do, I have to say this HORN is so stinking adorable.
 Check out the pic's and let me know what you think? If I find more horns what colors would you like to see? And as always share your ideas. I look forward to reading the comments.
Enjoy
Tracy
 Tre' Chic Designs
ps
visit me on Facebook
http://www.facebook.com/TreChicDesigns
or browse my Etsy shop
http://www.etsy.com/shop/TreChicDesigns?ref=si_shop


No comments:
Post a Comment